Have you had challenges with getting quality commercial cleaning results? Does it feel like you are dealing with cleaning issues repeatedly? Do you feel like you always have to manage or over manage the contractor or custodial department?
Whether you selected your cleaning vendor or you inherited them, if they are doing a bad job, you will have to deal with the consequences.
You may have to field complaints from employees or your bosses about un-emptied garbage cans, un-stocked or filthy washrooms and dirty break rooms.
Your company pays the price in the form of extra sick days, and that hits your bottom line in an insidious non-obvious way over the course of time.
So lets look at the big picture and determine the real cost of clean verses the “value of clean”. Here are some strategies you can use to ensure you hire the right janitorial service provider this time.
In the UK in 2008, the workplace density was 1 employee per 128 square feet. In 2013, it was 110 square feet per employee. So when analyzing a 25,000 square foot office you could have 15% more employees working in the same space.
When looking at time and motion studies, it takes 30 seconds to empty and replace a garbage liner. Just calculating the garbage liners for the increased amount of workers that’s more than 71 man-hours per year just for the garbage cans.
Depending on the rate of pay and corresponding expenses, that’s another $150 per month just to empty garbage cans in an office many would consider a smaller sized office. Since 2008 where the global economy has seen major changes, it seems reasonable that budgets for cleaning have lowered instead of keeping pace with the increased density of workplaces around the world.
A significant percentage of the Maintenance, Repairs and Operation budget is spent on janitorial or custodial services. In fact, the average is 30% of an MRO budget is spent on custodial services which is more than the next five expense items combined. It is critical to have a good handle on this expense.
Many property managers struggle with the cost of cleaning. It is an obtuse figure that’s hard to figure out. There are a large amount of variables that go into costing.
How much time does it take to clean your property?
How much do you need to have cleaned?
What are the frequencies of cleaning?
What are the types of areas that need cleaning, hard floors verses carpeting etc.?
What are the traffic patterns of your facility and how does that effect budgets?
The purchasing process for buying cleaning services is not always simple. Educating yourself on as many methods of costing is important to arm you with the information to ensure you are fully informed when it comes to the largest single expense in the MRO world.
When it comes to your janitorial budget, do you look exclusively at hourly costs? Do you sometimes also factor in supplies?
These are the normal costs that property managers consider when determining their commercial cleaning costs. However, as you dig into the details of your bids, budget, and balance sheets, you might be surprised to learn how many details go into a janitorial budget.
As you start reviewing bids and contractors for hire, you’ll quickly find that there are other important details that must be taken into consideration. Having a solid understanding of the types of costs that impact the price you pay will help you regain control over your budget.
Perhaps nothing is more sacred to your company than your reputation. One bad review could cost you thousands of dollars, right? Right.
Then, imagine this: You hire a janitorial company to work their magic on your property. You’re in a rush, so you make a hurried decision. Price plays a factor into your choice of service providers because, let’s face it, you don’t have an unlimited budget.
As you begin working with the new company, you realize that the importance of the janitorial proposal you should have requested before work began. The company has not fulfilled their oral promises, your company’s reputation is swirling down the drain, and you are struggling to communicate your dissatisfaction with the team you hired to help.
When it comes to hiring a new cleaning contractor, do you feel overwhelmed? If so, you are not alone. Making a decision about whom to hire to clean your property is tough.
Hiring the wrong contractor could put your property’s reputation at risk. It could cost you more money in the long-run from lost tenants and contracts.
As you start the process of hiring a cleaning contractor, you will need to request commercial cleaning bids. These bids expose the average market rate for a property and job such as yours. They also help you determine the contractors experience. Most important, getting multiple bids allows you to create a healthy amount of competition.
While there is no golden rule to the number of bids you need, there are benefits to getting 3 bids before hiring a cleaning contractor.
How to Clean Marble Bathrooms, Floors, Tables, Tiles, Countertops and Other Fixtures
You may wonder why there are special techniques used in the care and maintenance of marble. I mean, it’s a rock, right? True, but some stones are softer than others.
Marble is basically limestone that has combined and metamorphosed with other natural elements, making it a relatively soft rock that’s filled with veins of various colors and patterns.
Just like limestone, marble is easily etched, stained, and dulled. It’s more sensitive to certain foods and chemicals, and is not as impervious or as hard and resistant as granite.
Yet marble is very durable, and with proper care, it will last forever.
How to Clean Marble
Below you’ll find tips and information for the following:
Marble Sealers
Marble Maintenance
Proper Cleaning Solutions
How To Do Everyday Cleaning
Cleaning Marble Floors
Deeper Cleaning
Disinfecting
How To Clean Up Spills
Polishing
This may seem like a lot, but after you’ve learned a few simple cleaning and maintenance techniques, it becomes almost second nature, just like how you treat wood, cashmere or leather can become routine.
Please allow me to preclude the cleaning tips with a few care tips for new marble, because you should follow them before you clean new marble.
1. Marble Sealers
Immediately after your marble is installed, or after a thorough cleaning and ample drying time for older marble installations, you will sometimes want to apply a sealer to your marble for added protection.
Applying a sealant is pretty easy, and the cost and time involved is minimal when considering how proper marble care helps you avoid damage and expensive marble repair, as well as how it keeps your marble floors and countertops looking gorgeous for years on end.
How a Sealer Works – The sealing products you see used in the stone mason industry are actually impregnators, not sealers. They act more as a repellent. So don’t think a sealer will prevent all stain and damage to your marble. However, an impregnating sealer is often recommended, as it will greatly reduce marble stains from spills that are wiped up immediately.
Sealers Do Not Totally Prevent Scratches or Stains. Sealing does not make the stone stain proof, rather it makes the stone more stain resistant.
Sealing will not prevent scratches or etching (chemical etching often occurs due to acidic substances, such as household cleaners and acidic foods).
Choose the Proper Sealer – Use a high quality sealer made specifically for stone or marble. There are many out there, and it might be hard to know which ones will do the best job at penetrating the stone or which lasts the longest. We personally recommend sealers like SenGuard or Stone Care to help protect your marble.
For kitchen counters, be sure your sealer is non-toxic and safe for use in food preparation areas.
2. Marble Maintenance
Efflorescence – For I newly installed marble, you might see a white powder that appear on the surface. This is normal, and harmless. It’s just mineral salt deposits brought up through the stone as the water in the stone evaporates.
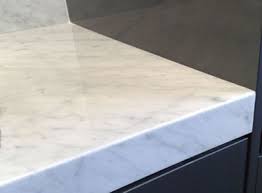
How to Clean Marble Countertops
You can vacuum or dust mop the powder, but don’t use water to remove the powder, as that will the stone longer to dry out and finish evaporating its own moisture.
You may have to do this many times until the stone permanently dries out, but if the efflorescence problem persists for more than two months, contact the installer to determine if there isn’t something else causing the moisture.
Protect Marble From Scratches. No sharp objects. Don’t scoot or set sharp-edged objects directly on marble.
Use coasters, trivets and mats. Use coasters for glasses, trivets or placemats for plates, and mats for appliances on marble countertops. This not only prevents scratches, but prevents damage from heat, or etching caused by spills of acidic drinks such as orange juice or alcohol. To keep it simple, just treat your marble like nice wood, and use coasters.
Use padding. Use padding under table legs and chairs. No heavy objects on thin marble. Don’t stand or sit on your marble countertops or tables. Too much weight can cause a crack on thinner marbles, like that used for countertops.
Use vanity trays. Place toiletries such as hand soaps, toothpaste, lotions, perfumes, etc., on a decorative bathroom vanity tray. This protect from scratches, as well as etching caused by chemicals in hygiene products, and may even prevent stains from those products, as well. Such a bathroom vanity tray will not only protect your marble bathroom sink counter area, but you’ll feel like you’re in a fancy hotel with posh decor.
Use floor mats, area rugs and hallway runners near every entrance, as well as any high traffic area where you have marble tile floors. This helps minimize scratches from dirt, sand and grit. Of course, make sure your rugs are slip-resistant.
3. Proper Cleaning Solutions
Many common household cleaners contain alkalis, acids, and chemicals that can damage or etch your countertop surface, as well as thin and dissolve the sealant, which leaves your marble vulnerable to damage from stains.
Cleaning marble with your typical brand name or generic household cleaners, and even natural cleaners, is the most common cause of marble damage.
Don’t use ammonia, vinegar, orange or lemon for cleaning. Although vinegar is a good cleaning agent and disinfectant for many surfaces, it is acidic, as are the other items mentioned, and they can cause corrosive etching on your marble.
And definitely don’t use the average bathroom, grout cleaner, or tub and tile type cleaners. These often use abrasives that can dull and even scratch the surface of your marble.
Many rust removers that are commercially available, such as toilet bowl cleaners and laundry rust stain removers, contain trace amounts of hydrofluoric acid (HF). The silicates and other minerals in your marble will be attacked by the HF acid and deteriorate them.
So What Do You Use To Clean Marble?
I’ve heard it said that you simply use hot water and a sponge for daily cleaning, and once a week use a stone cleaner. However, that seems to me like it applies just to floors or areas that don’t need to be sterile. Some disinfecting tips are listed below.
Whatever you do, only use cleaning products specifically formulated for cleaning marble and you will save yourself the headache and hassle of costly and time-consuming re-polishing or repairs.
There are many marble cleaning products on the market, but four brands that have proven to be better than most are Marble Life, SCI, Miracle and Stone Tech). They all offer great quality and value.
4. How To Do Everyday Cleaning
Whatever cleaner you use, make sure you use it with a sponge, soft cloth, chamois, or dust mop. Don’t scrub because you will spread bits of dirt and sand around, which could scratch the marble.
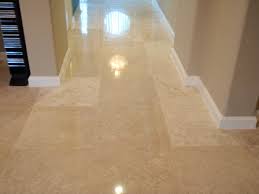
How to Clean Marble Floors
Run the damp sponge or cloth gently over the surface while making a circular motion in any spots that might need a extra pressure. Thoroughly rinse the surface after washing, and be sure to change the rinse water frequently when cleaning larger or extra-dirty surfaces.
Don’t leave either pools of water or even a slight layer of moisture to dry on the marble to prevent stains and scum build-up. Use a soft, dry cloth to dry all the marble surfaces after you’ve cleaned them. Then buff it with a second dry cloth for a nice shine. (See below for more polishing tips.)
5. Cleaning Marble Floors
Dust mop floors made with marble tile on a regular basis. Unless you plan to eat off your floor, the only cleaners you need to use to clean your marble regularly are hot water for daily cleaning and a specially formulated stone cleaner once a week.
Use a non-treated, dry, clean, dust-mop. Be extra careful if you use a vacuum cleaner because grit jammed in the wheels or ragged, worn parts can scratch the surface. So be sure the wheels are not rough, and that the plastic or metal attachments or in good shape, preferably with soft bristles that are not worn.
6. Deeper Cleaning
You can get a deeper cleaning with a light, natural soap, or take some gentle dish soap and dilute it yourself, as the suds help remove dirt particles trapped in the marble pores.
Similar to any item cleaned in your home, an excessive concentration of cleaner or soap may leave a film and cause streaks, so use it sparingly and buff it with a soft cloth afterwards for a beautiful shine.
Tip: Minimize soap scum in commonly wet areas, such as the bathroom, by using a squeegee after each use. You can also look for a non-acidic soap scum remover specifically designed for marble.
Of course, we want to disinfect surfaces in the bathroom, kitchen I and other areas, and areas such as hot tubs and pools sometimes attract algae, moss and mold. So go ahead and flush the area with plain water and use a mild bleach solution to thoroughly sterilize an area.
7. Disinfecting
There are commercial cleaners available that are specifically made for marble, that will disinfect and won’t harm your marble. But if you’re in a pinch and need to disinfect something right away, there are common household items you can use.
Hydrogen Peroxide – Mold is common in bathroom tile grout and can be a serious health concern. To get rid of the mold, mix one part 3% hydrogen peroxide with two parts water and spray on the effected areas. Wait an hour before rinsing or showering. It does act like a bleach in that it will lighten darker marbles (and can bleach your clothes, or hair, etc.) so it’s best for lighter color marble surfaces.
Vinegar or Ammonia – Bleach is not the only solution. I know I mentioned how ammonia and vinegar should be avoided because they can hurt your marble. But if you need to disinfect your marble and can’t wait to find a better cleaner, then you can use ammonia OR vinegar on occasion. Just don’t get in the habit of it, as it really will dull and etch your marble. But as long as you use a low concentration, rinse well with plain water, buff it well afterwards, and use a polish, and don’t use it too often, then it shouldn’t harm your marble. DANGER: do not EVER mix bleach with vinegar, or ammonia and bleach, or ammonia and vinegar, etc. Use each one separately. Mixing any of them together causes harmful gases that will damage your lungs and the lungs of those around you.
Bleach – Bleach is toxic and should be a last resort. Also, bleach can lighten darker marbles, but it is an effective disinfectant for lighter marbles if used properly. To kill common bacteria and regular disinfecting of food related surfaces, use unscented, regular 5% to 6% household bleach, as recommended by The Center for Disease Control (CDC, an American government regulatory agency) at a ratio of 1 tsp bleach per gallon of water. For common disinfecting of all other surfaces, use 1 Cup of bleach per 5 gallons of water. And to kill mold and mildew that has already gotten a foothold, use 1 Cup of bleach per one (1) gallon of water.
8. How To Clean Up Spills
Marble can become stained or etched quickly if a liquid or even dry powders sit on it for even a short period of time. Especially clean up wet spills like coffee, any type of black tea, orange juice, and wine immediately after they are spilled.
Dry spills are serious, too. Materials with staining pigments, such as curry, cumin, coffee grounds, and even leafy greens, should be gently vacuumed or swept up right away when they’re spilled on any marble surface.
How to Clean Up a Spill – Blot. Flush. Dab. Repeat. Blot up spills with a paper towel immediately. Don’t rub as you wipe the area, or it it will push the spilled substance into the pores of the marble as well as spread the spill. Flush the area with mild soap or cleaner of your choice, or even just plain water, and rinse several times. Thoroughly dry the area with a soft cloth. Repeat as necessary.
8. Polishing
After each cleaning, after you’ve dried the marble, give it a quick buff with a soft cloth. This helps remove cleaning solution residues and gives your marble a shiny glow. There are also commercial marble polishes available. Just make sure it’s intended specifically for marble. Not all stone is the same, so it’s best to avoid cleaners made for granite or even for cleaning ”stone” in general.
Stone PLUS Cleaner has received rave reviews for its effectiveness on marble.
A spray surface dressing, such as Dazzle Topical Polish Shine Enhancer, will improve the shine and give your marble a little more protection.
Polishing a marble floor can make a very slippery surface when wet, so take precaution when other people may walk on those floors shortly after you’ve polished them.
Marble is so gorgeous, with luxurious beauty, that it is well worth the time it takes to learn and apply these few marble care tips.
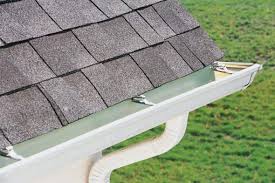
Cleaning the gutters and downspouts of your house just comes with the territory of owning a home, but it doesn’t have to be a big chore. Although it’s not the most fun task, it isn’t that difficult, doesn’t take that long, and will help prevent damage to your roof and the eaves themselves. Plus, it helps make your house look nicer.
Why You Should Clean Your Gutters
If you don’t clean your gutters, major damage will eventually plague your house when rainwater cannot go down a blocked drain. That blocked water builds up and gets under your shingles or rooftop material, and
How to Clean House Gutters
rots the wood of your roof, trim and siding, and water can even get into your house, which we all know is not good.
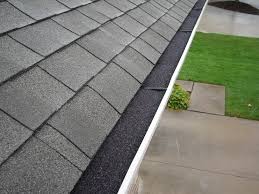
Downspouts that are clogged in fall and not cleaned before the snow falls can become a problem. During warm winter days or the spring when the snow melts, if the melt water cannot go down the drain, tis can cause a big ice lip to build up at the edge or your roof that not only prevents snow from sliding off your roof, but it also puts a massive amount of weight on your roof. This can lead to a damaged roof or even a collapsed roof.
Even if the roof eaves of your house don’t get clogged or overflow each season, it’s just not a good idea to leave decaying debris in your gutters, as it’s an invitation to mosquitoes and carpenter ants.
So no matter how busy or lazy you feel, the little effort it takes to clean your gutters can save you lots of headache and damage costs. It’s definitely worth the effort, and not worth the consequences if you don’t do it. So let’s get to it.
Get the Right Tools
Ladder
Gloves
Trowel or Hand Scoop
Trash bag or Bucket
Rope (if you do this alone)
Garden Hose
Be Safe
If your home is more than one story, you may need an extension ladder. But even if your house is only one story, you could get seriously hurt if you fall. So no matter how many stories you have, make sure your ladder is stable. Either use a stabilizer, or make sure you’re on level ground, or both.
Figure out how you’re going to get your trash bag or bucket down before you start. It will be heavy and awkward, but if you can hand it to someone, or lower it with a rope if you’re doing this job solo, you’ll want to have this planned out before you start. Don’t wait until you’re umpteen feet above the ground, on the roof, balancing a heavy bag, wondering what to do with it.
Gloves don’t just help keep your hands and nails clean, but they can protect your hand from sharp objects. Leather ones will protect your hands better than cloth, as well as keep them cleaner. Make sure they’re the right size so you can do this job safely and properly.
Where to Start
After you have all your tools in place, it’s best to start where the downspouts are, which is typically at the corners, but not always.
Start at the downspouts so you can avoid pushing debris down the downspout and further clogging it, by simply pushing debris away from the drain hole as you clean the gutters.
Do it Right
Simply scoop the debris into your bag or bucket. Use your trowel for the big stuff, and you may need to use your hands for the small stuff and gunk stuck to the bottom. If the debris is wet, I recommend a
How To Clean House Gutters Quickly and Easily
bucket rather than a bag, unless you use an extra sturdy bag. Wet stuff is heavier than dry stuff, so you may not want to fill the bag all the way up.
After all the larger debris is removed, rinse the gutter with your garden hose, spraying toward the direction of the nearest downspout.
You will need to clear any downspouts that may be clogged. If you start by spraying water down the spout from the top, you may just compact the clog so it gets lodged in tighter and becomes harder to budge. The best way is to start at the bottom of the drain spout and shoot some water up so it hits the bottom of the clog by using the spray nozzle of your hose at the highest pressure setting. Then get on the roof and shoot water down the pipe from the top. If it’s a loose clog, this should clear it up. If this still doesn’t clear it up, you can use a plumber’s snake, or if the clog is near the top, any type of long pole, like the end of a rake, will do. Collect the clog at the bottom of the spout after it comes out and put it in your debris receptacle.
Follow all the above procedures for all your gutters and downspouts of your home, garage, or any outbuildings you have that have gutters.
And finally, dispose of all the debris you’ve collected by putting it in the trash, or more preferably, a compost pile. You may already have your own compost pile, or can start one, or often your local city offices can tell you where a free community compost trash receiving site is located.
And that’s How to Clean House Gutters Quickly and Easily!
And now you can sit back and relax as you pat yourself on the back for taking care of business and keeping your property well taken care of. It’s okay to admire your own work, because not only do you now have clean gutters, but also peace of mind.
Prevent Future Problems
Use a stand-off or stabilizer, which not only keeps your ladder stable, but it also keeps your ladder from resting on, and thus possibly damaging or denting your gutters.
Inspect the gutters and downspouts now for any signs of damage. Look for holes, dents, or cracks. If you discover any signs of damage, repair them as soon as possible.
It’s best to clean the eaves and gutter spouts of in late spring or after nearby trees have finished shedding their leaves in the fall. If there copious amounts of trees or rain in your area, you should probably check your gutters more often.
Other Tips
Install leaf strainers inside the eave near the drain hole to prevent leaves from going down, and possibly clogging, your downspout.
You may want to consider installing guards that prevent the debris from sliding off your roof into your gutter in the first place. They won’t stop all falling leaves and branches from landing in your gutter, but can make your biannual gutter cleaning much more easy in the future.
Your local city yard refuse disposal site is also a great place to get free compost for your garden in the spring.
Laundry boosters are additives that you add to your washing machine to help make your regular laundry detergent more effective.
Laundry detergent boosters can be either organic homemade laundry soap or a store bought brand. There are a variety of recipes to make your own, and just like any laundry detergent, boosters came in many different brands, sizes, shapes, colors. Some are liquid and some are dry powder.
Laundry Boosters
You can make or buy laundry boosters with all natural ingredients and essential oils for an all-natural scent, or ones that are infused with fragrances formulated in a lab. And all types offer an unscented version.
Most can be used on delicates, cotton, polyester, wool, other fabrics, and can sometimes even be used for other cleaning purposes. However, they’re usually not recommended for use on leather.
Why Use Laundry Boosters
Although you might think regular laundry detergent should get the job done, laundry boosters add a special touch to your help get your laundry even cleaner in the following ways:
Cleans away soil and dirt
Removes stains and grease
Helps prevent discoloration of your clothes
Helps keep whites brighter
Adds a little kick in your effort to eliminate odors.
Makes your clothes softer
I like to use boosters on all my loads of laundry, but they are especially useful for those extra smelly loads of laundry we all abhor, such as sweaty sports clothing, ‘soiled’ underwear, dirty diapers, pet bedding, well-used sneakers, etc.. Many are also designed to a super washing soda baby detergent that is gentle on extra sensitive skin.
How to Use Laundry Boosters
Be sure to use your booster with your regular laundry detergent, and don’t wash your laundry with a booster alone.
Each laundry booster product or recipe has its own instructions about quantity and timing, but usually you just add a little to the wash at the beginning of the wash cycle.
Many boosters are made for all washing machine types, but some are made for only top loading washing machines, and some are made specifically for HE (High Efficiency) washing machines. Again, read the label, but know that there is a booster out there for every type of machine, from front loading machines, to hand washing or other multi-purpose uses.
You will, of course, want to follow all your other laundry washing guidelines, such as washing wool only in cold water, and not mixing whites and color clothes in the same wash load. But generally speaking, most laundry boosters are made for cold, warm or hot water, and for all material types.
You’ll find laundry boosters that can be used on delicates, cotton, polyester, wool, other fabrics, and can sometimes even be used for other cleaning purposes. Most are color safe, but to be laundry safe, be sure to read that label.
Pre-Wash Tips
Laundry boosters also work great as a pre-wash treatment for grease stains by mixing it with a little water and rubbing your new laundry booster ‘paste’ into the stain.
You can also eliminate odors around your laundry basket, as stinky clothes are waiting to hit the wash by shaking certain types of laundry boosters lightly on the clothes before you wash them.
How Do Laundry Boosters Work?
Some say boosters work best with soft water, but doesn’t everything? Soft water makes soap bubble up more, and soft water makes everything, from skin to clothes, softer. But boosters actually act as a water softener, and thus, they are especially effective for use with hard water.
If your booster has baking soda in it, then the high pH of this alkaline substance helps soften your hard water, or make your soft water softer. This makes your laundry detergent more efficient and enhances its ability to remove dirt and stains. Plus, baking soda is a natural deodorizer and is great for removing foul odors.
If you’re a fan of Borax, you’ll find laundry booster is one many Borax uses you maybe didn’t know about.
Some boosters use ‘oxygen bleach’ that is well known for brightening laundry, as well as removing other household stains outside the laundry arena.
And yet some laundry boosters are loaded with active enzymes that act to help brighten your colored and white clothes alike.
So whatever you’re washing, you still need to shop around, depending on your ingredient preferences and laundry needs, but just about everyone can benefit form some sort of laundry booster or another.
Learning how to get rid of dust mites is important in order to help control allergic reactions in your home.
Dust mites feed on organic materials such as flakes of shed human skin and flourish in the stable environment of dwellings. House dust mites are a common cause of asthma and allergic symptoms worldwide. The mite’s gut contains potent digestive enzymes that persist in their feces and are major inducers of allergic reactions. The mite’s exoskeleton can also contribute to allergic reactions. Here is a natural remedy for the control of dust mites.
How to get rid of dust mites
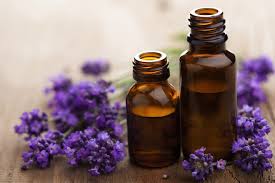
Researchers at Alexandria University in Egypt found certain essential oils to be effective at killing dust mites, the invisible-unless-under-a-microscope creatures that tend to live in bedding, carpets, furniture and drapes. If you want to keep your allergies at bay, eucalyptus and clove were proven to be the most effective oils for eliminating household dust mites.
Here are three tips on how to get rid of dust mites:
Add around 10 drops of an oil in with your laundry detergent when you wash your sheets in hot water.
Fill a spray bottle with 1 quart of water and 20 drops of an oil to spray on upholstery.
Put baking soda in a sifter and add in 10 drops of an essential oil to shake across carpeting. Then leave the mixture on the floor for 30 minutes and vacuum it up.
How to get rid of dust mites using essential oils
By learning how to get rid of dust mites, you can control and limit their impact in your home.