Moving into a new home or apartment can be exciting and also somewhat stressful especially for the unprepared. However, one simple way to ease the transition is to begin by moving boxes and furnishings into a sparkling clean home that’s ready to live in while unpacking. Even a new construction home may need cleaning due to left-over construction debris and dust. Here is how to properly clean a home to streamline moving into a new home.
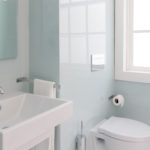
Begin by Cleaning the Bathroom
Clean Bathroom
Utilized multiple times daily to handle some of our most unsanitary hygenic deeds and needs, the bathroom is the prime spot for cleaning duties.
After all, even while unloading the moving truck, this room will likely be the first needed. Even though the home was made to look presentable by previous owners or right after construction if the home is new, there’s no guarantee that it has been thoroughly cleaned and disinfected.
Clean by sanitizing the area thoroughly. Take time to clean behind the toilet, under the rim of the toilet and within any cabinetry or shelving. Don’t forget to scourge the shower and tub. Take time to reseal the grout or to re-caulk surrounds and faucets if necessary. Don’t forget to clean the lighting fixture and air intake vent if one is present.
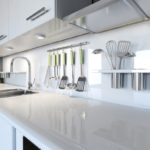
Get the Kitchen Prepped Before Moving Into a New Home
The next room likely to be needed will be the kitchen, so it should be next on the rooms to be cleaned before moving into a new home. Not only does moving build up hunger and thirst, but if the move is nearby the old home, there will likely be food that needs to be refrigerated or frozen to put away.
Clean kitchen
Before moving into a new home, be sure to completely clean the inside of the refrigerator and the stove. Many stoves come with self-cleaning modes, but this is a long process that can smoke up the house. If possible do this before moving day. Pull the stove and refrigerator away from the wall and sweep beneath them if possible.
Take time to clean the pantry and cabinet shelves and scrub the exteriors to remove any old residue that has accumulated. Those who desire shelf paper or liners should put it down now before unpacking the kitchen. If there is a dishwasher, perform a self-cleaning cycle using a decalcifier so it’s ready for the first load of dishes. Sanitize handles of faucets, doors, cabinets, etc., as these are often missed by sellers during cleanings.
Getting the Rest of the Home in Order
Concerning cleaning the remaining rooms of the home, we recommend hitting up the bedrooms next followed by the living and dining room areas. In each room, start top to bottom paying close attention to light fixtures, windows, doors, walls and floors. Fully disassemble light fixtures and clean any globes or bulb covers thoroughly in addition to their housing units.
Take a damp cloth and run it across the walls to see if they need cleaning, as many people never think about washing walls. If this process needs to be tackled, be sure to use a cleaner appropriate for the surface. Don’t forget to get into the grooves of the crown molding and floor trim while paying extra attention to corners.
Washing windows may seem mundane, but they are what allows us to enjoy the views of Mother Nature while allowing natural light to grace interior spaces. It’s a good idea to remove any screens and hose them down. While they dry, go ahead and shine up those exterior window panes. Don’t neglect doorknobs, as they are one of the biggest harborers of germs and residue that can cause illness. Now, let’s talk about those floors
Finishing Up With Spotless Floors
Take time to clean flooring and carpets properly. It’s best to handle certain flooring types such as carpeting in advance if the opportunity exists. Deep cleaning carpets is time consuming. There is also the consideration of drying time. However, the remarkable results make it well worth the effort. This may actually be a task worth hiring a professional for, especially if the move is from afar. It gets more challenging to clean carpets after furnishings have been placed.
Generally, sweeping, mopping or steam cleaning tile, ceramic, wood or laminate flooring will suffice, but it should be the last task after the move is complete. This is an ideal time to also make note of any repairs that may be needed, as this is likely the closest inspection you’ll get of the floor for a while.
Now, you can move into your new home or apartment with the satisfaction knowing that it is now spotless and clean!
Guest post by Preston Guyton REALTOR
Broker in Charge/Managing Partner, CRG Companies, Inc.
7717 N. Kings Hwy, Myrtle Beach, SC 29572
Construction, Real Estate and Green. http://www.crgcompaniesinc.com
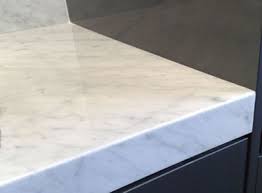
How to Clean Marble Bathrooms, Floors, Tables, Tiles, Countertops and Other Fixtures
You may wonder why there are special techniques used in the care and maintenance of marble. I mean, it’s a rock, right? True, but some stones are softer than others.
Marble is basically limestone that has combined and metamorphosed with other natural elements, making it a relatively soft rock that’s filled with veins of various colors and patterns.
Just like limestone, marble is easily etched, stained, and dulled. It’s more sensitive to certain foods and chemicals, and is not as impervious or as hard and resistant as granite.
Yet marble is very durable, and with proper care, it will last forever.
How to Clean Marble
Below you’ll find tips and information for the following:
Marble Sealers
Marble Maintenance
Proper Cleaning Solutions
How To Do Everyday Cleaning
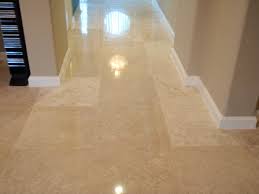
Cleaning Marble Floors
Deeper Cleaning
Disinfecting
How To Clean Up Spills
Polishing
This may seem like a lot, but after you’ve learned a few simple cleaning and maintenance techniques, it becomes almost second nature, just like how you treat wood, cashmere or leather can become routine.
Please allow me to preclude the cleaning tips with a few care tips for new marble, because you should follow them before you clean new marble.
1. Marble Sealers
Immediately after your marble is installed, or after a thorough cleaning and ample drying time for older marble installations, you will sometimes want to apply a sealer to your marble for added protection.
Applying a sealant is pretty easy, and the cost and time involved is minimal when considering how proper marble care helps you avoid damage and expensive marble repair, as well as how it keeps your marble floors and countertops looking gorgeous for years on end.
How a Sealer Works – The sealing products you see used in the stone mason industry are actually impregnators, not sealers. They act more as a repellent. So don’t think a sealer will prevent all stain and damage to your marble. However, an impregnating sealer is often recommended, as it will greatly reduce marble stains from spills that are wiped up immediately.
Sealers Do Not Totally Prevent Scratches or Stains. Sealing does not make the stone stain proof, rather it makes the stone more stain resistant.
Sealing will not prevent scratches or etching (chemical etching often occurs due to acidic substances, such as household cleaners and acidic foods).
Choose the Proper Sealer – Use a high quality sealer made specifically for stone or marble. There are many out there, and it might be hard to know which ones will do the best job at penetrating the stone or which lasts the longest. We personally recommend sealers like SenGuard or Stone Care to help protect your marble.
For kitchen counters, be sure your sealer is non-toxic and safe for use in food preparation areas.
2. Marble Maintenance
Efflorescence – For I newly installed marble, you might see a white powder that appear on the surface. This is normal, and harmless. It’s just mineral salt deposits brought up through the stone as the water in the stone evaporates.
How to Clean Marble Countertops
You can vacuum or dust mop the powder, but don’t use water to remove the powder, as that will the stone longer to dry out and finish evaporating its own moisture.
You may have to do this many times until the stone permanently dries out, but if the efflorescence problem persists for more than two months, contact the installer to determine if there isn’t something else causing the moisture.
Protect Marble From Scratches. No sharp objects. Don’t scoot or set sharp-edged objects directly on marble.
Use coasters, trivets and mats. Use coasters for glasses, trivets or placemats for plates, and mats for appliances on marble countertops. This not only prevents scratches, but prevents damage from heat, or etching caused by spills of acidic drinks such as orange juice or alcohol. To keep it simple, just treat your marble like nice wood, and use coasters.
Use padding. Use padding under table legs and chairs. No heavy objects on thin marble. Don’t stand or sit on your marble countertops or tables. Too much weight can cause a crack on thinner marbles, like that used for countertops.
Use vanity trays. Place toiletries such as hand soaps, toothpaste, lotions, perfumes, etc., on a decorative bathroom vanity tray. This protect from scratches, as well as etching caused by chemicals in hygiene products, and may even prevent stains from those products, as well. Such a bathroom vanity tray will not only protect your marble bathroom sink counter area, but you’ll feel like you’re in a fancy hotel with posh decor.
Use floor mats, area rugs and hallway runners near every entrance, as well as any high traffic area where you have marble tile floors. This helps minimize scratches from dirt, sand and grit. Of course, make sure your rugs are slip-resistant.
3. Proper Cleaning Solutions
Many common household cleaners contain alkalis, acids, and chemicals that can damage or etch your countertop surface, as well as thin and dissolve the sealant, which leaves your marble vulnerable to damage from stains.
Cleaning marble with your typical brand name or generic household cleaners, and even natural cleaners, is the most common cause of marble damage.
Don’t use ammonia, vinegar, orange or lemon for cleaning. Although vinegar is a good cleaning agent and disinfectant for many surfaces, it is acidic, as are the other items mentioned, and they can cause corrosive etching on your marble.
And definitely don’t use the average bathroom, grout cleaner, or tub and tile type cleaners. These often use abrasives that can dull and even scratch the surface of your marble.
Many rust removers that are commercially available, such as toilet bowl cleaners and laundry rust stain removers, contain trace amounts of hydrofluoric acid (HF). The silicates and other minerals in your marble will be attacked by the HF acid and deteriorate them.
So What Do You Use To Clean Marble?
I’ve heard it said that you simply use hot water and a sponge for daily cleaning, and once a week use a stone cleaner. However, that seems to me like it applies just to floors or areas that don’t need to be sterile. Some disinfecting tips are listed below.
Whatever you do, only use cleaning products specifically formulated for cleaning marble and you will save yourself the headache and hassle of costly and time-consuming re-polishing or repairs.
There are many marble cleaning products on the market, but four brands that have proven to be better than most are Marble Life, SCI, Miracle and Stone Tech). They all offer great quality and value.
4. How To Do Everyday Cleaning
Whatever cleaner you use, make sure you use it with a sponge, soft cloth, chamois, or dust mop. Don’t scrub because you will spread bits of dirt and sand around, which could scratch the marble.
How to Clean Marble Floors
Run the damp sponge or cloth gently over the surface while making a circular motion in any spots that might need a extra pressure. Thoroughly rinse the surface after washing, and be sure to change the rinse water frequently when cleaning larger or extra-dirty surfaces.
Don’t leave either pools of water or even a slight layer of moisture to dry on the marble to prevent stains and scum build-up. Use a soft, dry cloth to dry all the marble surfaces after you’ve cleaned them. Then buff it with a second dry cloth for a nice shine. (See below for more polishing tips.)
5. Cleaning Marble Floors
Dust mop floors made with marble tile on a regular basis. Unless you plan to eat off your floor, the only cleaners you need to use to clean your marble regularly are hot water for daily cleaning and a specially formulated stone cleaner once a week.
Use a non-treated, dry, clean, dust-mop. Be extra careful if you use a vacuum cleaner because grit jammed in the wheels or ragged, worn parts can scratch the surface. So be sure the wheels are not rough, and that the plastic or metal attachments or in good shape, preferably with soft bristles that are not worn.
6. Deeper Cleaning
You can get a deeper cleaning with a light, natural soap, or take some gentle dish soap and dilute it yourself, as the suds help remove dirt particles trapped in the marble pores.
Similar to any item cleaned in your home, an excessive concentration of cleaner or soap may leave a film and cause streaks, so use it sparingly and buff it with a soft cloth afterwards for a beautiful shine.
Tip: Minimize soap scum in commonly wet areas, such as the bathroom, by using a squeegee after each use. You can also look for a non-acidic soap scum remover specifically designed for marble.
Of course, we want to disinfect surfaces in the bathroom, kitchen I and other areas, and areas such as hot tubs and pools sometimes attract algae, moss and mold. So go ahead and flush the area with plain water and use a mild bleach solution to thoroughly sterilize an area.
7. Disinfecting
There are commercial cleaners available that are specifically made for marble, that will disinfect and won’t harm your marble. But if you’re in a pinch and need to disinfect something right away, there are common household items you can use.
Hydrogen Peroxide – Mold is common in bathroom tile grout and can be a serious health concern. To get rid of the mold, mix one part 3% hydrogen peroxide with two parts water and spray on the effected areas. Wait an hour before rinsing or showering. It does act like a bleach in that it will lighten darker marbles (and can bleach your clothes, or hair, etc.) so it’s best for lighter color marble surfaces.
Vinegar or Ammonia – Bleach is not the only solution. I know I mentioned how ammonia and vinegar should be avoided because they can hurt your marble. But if you need to disinfect your marble and can’t wait to find a better cleaner, then you can use ammonia OR vinegar on occasion. Just don’t get in the habit of it, as it really will dull and etch your marble. But as long as you use a low concentration, rinse well with plain water, buff it well afterwards, and use a polish, and don’t use it too often, then it shouldn’t harm your marble. DANGER: do not EVER mix bleach with vinegar, or ammonia and bleach, or ammonia and vinegar, etc. Use each one separately. Mixing any of them together causes harmful gases that will damage your lungs and the lungs of those around you.
Bleach – Bleach is toxic and should be a last resort. Also, bleach can lighten darker marbles, but it is an effective disinfectant for lighter marbles if used properly. To kill common bacteria and regular disinfecting of food related surfaces, use unscented, regular 5% to 6% household bleach, as recommended by The Center for Disease Control (CDC, an American government regulatory agency) at a ratio of 1 tsp bleach per gallon of water. For common disinfecting of all other surfaces, use 1 Cup of bleach per 5 gallons of water. And to kill mold and mildew that has already gotten a foothold, use 1 Cup of bleach per one (1) gallon of water.
8. How To Clean Up Spills
Marble can become stained or etched quickly if a liquid or even dry powders sit on it for even a short period of time. Especially clean up wet spills like coffee, any type of black tea, orange juice, and wine immediately after they are spilled.
Dry spills are serious, too. Materials with staining pigments, such as curry, cumin, coffee grounds, and even leafy greens, should be gently vacuumed or swept up right away when they’re spilled on any marble surface.
How to Clean Up a Spill – Blot. Flush. Dab. Repeat. Blot up spills with a paper towel immediately. Don’t rub as you wipe the area, or it it will push the spilled substance into the pores of the marble as well as spread the spill. Flush the area with mild soap or cleaner of your choice, or even just plain water, and rinse several times. Thoroughly dry the area with a soft cloth. Repeat as necessary.
8. Polishing
After each cleaning, after you’ve dried the marble, give it a quick buff with a soft cloth. This helps remove cleaning solution residues and gives your marble a shiny glow. There are also commercial marble polishes available. Just make sure it’s intended specifically for marble. Not all stone is the same, so it’s best to avoid cleaners made for granite or even for cleaning ”stone” in general.
Stone PLUS Cleaner has received rave reviews for its effectiveness on marble.
A spray surface dressing, such as Dazzle Topical Polish Shine Enhancer, will improve the shine and give your marble a little more protection.
Polishing a marble floor can make a very slippery surface when wet, so take precaution when other people may walk on those floors shortly after you’ve polished them.
Marble is so gorgeous, with luxurious beauty, that it is well worth the time it takes to learn and apply these few marble care tips.
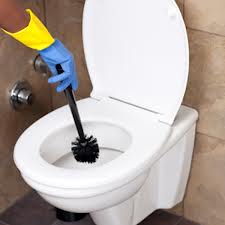
It is important to know how to clean a toilet properly.
Start with getting your cleaning supplies together.
Supplies:
How to Clean a Toilet
Clean, dry cloths/rags
Glass or multi-surface cleaner
Toilet bowl cleanser (liquid or powder)
Toilet bowl brush
Steps for how to clean a toilet:
Fold your cleaning cloth in quarters so you can rotate the cloth to a clean dry surface after you clean each area.
Start with the handle and tank. Spray your glass or multi-surface cleaner on the surface and wipe with your dry cloth, cleaning the surface but being sure the surface isn’t too wet since you want to be able to polish the surface dry. Do not clean the lid, seat or any other area of the toilet before cleaning the handle and tank or you will be spreading around germs from the dirtier areas to the areas that typically aren’t as dirty.
Move to the lid and seat. Apply your cleaner and use a clean, dry surface of your cloth to clean and polish dry. The seat is likely the most dirty surface and often you will have to use more cleaner and/or more cleaning cloths than with other parts of the toilet.
On to the toilet bowl. Sprinkle cleanser in the bowl, making sure you cover the entire bowl, sides of the bowl included. Dip your brush in the toilet water to wet it then sprinkle cleanser on it as well. Scrub in a circular motion starting at the top of the bowl and working your way down to the bottom of the water in the bowl. Once done, shake the excess water off of your brush and flush the toilet afterwards to rid yourself of germs that could crawl back up onto the toilet. Remember to scrub under the rim of the bowl. Many people miss this area and as a result, it becomes an area for unpleasant guests to thrive. Also, scrubbing from top to bottom of the bowl is a more effective way of cleaning because the toilet water becomes cloudy and dirt-filled if you start at the bottom. Contaminated water is not a good way to remove germs.
Finish by applying cleaner to the outside of the bowl and clean the front and sides of the bowl using the same technique.
Using a clean, dry cloth, you can touch up and polish dry any area of the toilet where there is excess cleaner which should leave you with a sparkling fresh toilet.
With the proper supplies and technique, it should take no more than two to three minutes to clean a toilet.
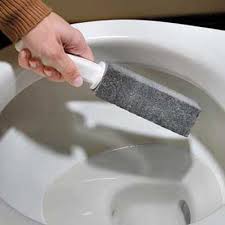
Pumice stone
If you have troublesome bowl stains that your standard cleaner cannot remove, using a commercial acid based bowl cleaner will usually do the trick. This can be found at any janitorial supply store. You can also use a pumice stone designed for toilet bowls if you don’t want to use harsh chemicals on tough stains.
Following the above steps on how to clean a toilet will keep it fresh and clean!
Keeping your makeup brushes clean will ensure they have a longer lifespan, saving you money in frequent replacement costs. Over time, makeup brushes accumulate dirt and debris, old makeup, oils, bacteria and dead skin cells. Yuck. In addition to being dirty, makeup brushes become scratchy when they are not clean which can irritate your skin.
The frequency of cleaning your brushes will depend how much you use them. You likely should be cleaning your makeup brushes a minimum of once a week. Having extra makeup brushes will allow you to rotate them into use, always having a clean one available.
Here are the steps to cleaning your makeup brushes:
1. Wet the makeup brush hairs under lukewarm running water, being careful to always tilt the brush downward so the water doesn’t run up into the handle, potentially loosening the glue that holds the makeup brush hairs in place.
2. Squirt a very small amount of mild baby shampoo onto your fingers. Mild foaming face wash works well also. (There are specialized cleaning solutions that are marketed as makeup brush cleaners. It is not necessary to use one of these solutions to clean your makeup brushes.) Gently massage the shampoo or soap into the hairs of the makeup brush. Rinse under lukewarm running water, again being careful to tilt the brush downward to avoid water getting in contact with the glue which holds the hairs in place. Keep rinsing until all the shampoo or soap is gone and the water is running clean.
3. Gently squeeze the makeup brush hairs using a clean paper towel or clean towel. Once most of the water has been absorbed, lay the brush on its side on a clean towel to air dry. Reshape the hairs in order to prevent splaying. The drying time will depend on the type and size of makeup brush. Be sure that the brush is completely dry before using it, otherwise makeup will stick to it and you’ll have to clean the makeup brush again before you can use it!
Hard water and soap scum can be kept at bay by using a sponge or towel soaked with lemon juice. The acidic lemon juice breaks down the dingy grey build up of soap scum/hard water stains. For build up you can use a commercial product designed for hard water stain removal, it will be a more aggressive acidic cleaner. Or a home remedy is to use cream of tarter and hydrogen peroxide to make a paste allow to dry and buff and rinse clean.
Potassium bitartrate (cream of tarter) can be mixed with an acidic liquid such as lemon juice or white vinegar to make a paste-like cleaning agent for metals such as brass, aluminum or copper, or with water for other cleaning applications such as removing light stains from porcelain.
The much easier solution is to clean the hard water/soap scum frequently so you don’t have a big tough job of scrubbing.
If your bathroom mirror fogs up after the shower or bath is used, turn your hairdryer on low setting and direct it at the mirror. The blowing air will quickly clear the fog without leaving smears or streaks.
How do I remove the ugly non-slip flowers and butterfly stickers from my old bathtub?
The adhesive used on these decorative non-slip pads are amazing. I have seen tubs with the surface of the baked enamel finish pulled up where the old sticker had been removed! In which case you need to repaint the area with touch up paint for bathtubs so it won’t rust.
Stickers from Bathtub
Here are some ideas that have been successful:
Cover the sticker with tinfoil and heat with a hair dryer, once the sticker has softened, use your fingernail, cuticle stick, or plastic ice scraper to carefully lift up an edge being sure to get all the layers. Avoid metal edges, as you can easily damage the tub. Slowly pull up and peel back the strip, trying to keep the top layer and clear adhesive film layer together.
If the layers do separate and the film tears as you progress, lift other edges around the strips, working toward the center until all parts of the sticker are free.
WD-40 is effective at removing sticky residue from the sticker as well. But the oily film from the wd-40 will need to be cleaned with soap and water once the sticker has been removed from the bathtub.
Baking soda is also useful for cleaning your teeth. If your teeth are stained by coffee or other substances you can brush your teeth with baking soda and it will polish your teeth, causing them to reflect more light and therefore appear “whiter.” The taste is not great, but some people myself included hate the taste of regular toothpaste.
Baking Soda Toothpaste
Here is a basic recipe;
1 teaspoon baking soda
1/2 teaspoon sea salt, finely ground
1 drop peppermint, spearmint, sweet orange, clove, or cinnamon bark essential oil
A few drops tap water
Combine ingredients in a small bowl and mix them thoroughly with a toothbrush, your finger, or a small spoon until a smooth, thick paste forms. The paste shouldn’t be too runny; it has to stay on your toothbrush.
Dip your toothbrush into the paste and brush away.
Generally, sodium bicarbonate will work better on yellow or brown tooth stains as opposed to gray stains. Also, it is recommended by the American Dental Association that you consult with your dentist while using sodium bicarbonate on your teeth. You can buy several toothpastes that can be bought containing sodium bicarbonate found at any health food store and some grocery stores. Which maybe better than using a homemade version, but in a pinch if you have run out of toothpaste then a pinch of baking soda will do the trick.
How do I remove water spots from my clear glass showerdoors?
Try these techniques:
Depending on how bad they are a mixture of white vinegar and water (50:50) is an effective way to remove water spots.
If they are very bad then you should buy an acidic based cleaner to remove. Vinegar is mildly acidic so it will remove only so much. Go to your local janitorial supply store and buy acidic based bathroom cleaner and tell them what you are cleaning. You should have good success.
Be sure to wear gloves and follow safety instructions on the bottle for use and handling.
Be sure to start from the bottom of the doors as well to prevent streaks from forming from the acid wash.
If you live in an area where you have hard water then hang and use a small plastic squeegee in your shower and give your shower-door and quick wipe down at the end of each shower.
Cleaning grout can be a tedious task; one trick I have used in the past is to spray the grout after a shower using a homemade mixture of bleach: Dilute the bleach with water 1 part bleach to 3 parts water before cleaning with it. Bleach is especially good for removing mold and mildew. It kills the mold and disinfectants too. It also removes stains and discolorations from white grout. Do not use beach on colored grout it can discolor the grout. Be careful when using bleach and any other cleaners, never mix cleaning chemicals especially those containing ammonia.
I also keep a plastic squeegee in the shower and do a quick squeegee of the walls and door to reduce the amount of hard water staining on the tile and grout.
Another quick option is to buy a Grout Pen which basically paints on a color to replace the dirty looking grout, but you have to clean first anyway before you can color the grout.
Cleaning Grout
Cleaning grout can be a pain but by doing some of the work on an ongoing basis it can make the task easier.