Laundry Boosters

What are Laundry Boosters

Laundry boosters are additives that you add to your washing machine to help make your regular laundry detergent more effective.

Laundry detergent boosters can be either organic homemade laundry soap or a store bought brand. There are a variety of recipes to make your own, and just like any laundry detergent, boosters came in many different brands, sizes, shapes, colors. Some are liquid and some are dry powder.

laundry boosters
Laundry Boosters

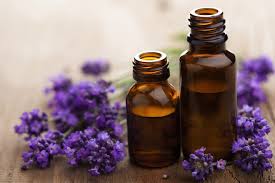
You can make or buy laundry boosters with all natural ingredients and essential oils for an all-natural scent, or ones that are infused with fragrances formulated in a lab. And all types offer an unscented version.

Most can be used on delicates, cotton, polyester, wool, other fabrics, and can sometimes even be used for other cleaning purposes. However, they’re usually not recommended for use on leather.

Why Use Laundry Boosters

Although you might think regular laundry detergent should get the job done, laundry boosters add a special touch to your help get your laundry even cleaner in the following ways:

  • Cleans away soil and dirt
  • Removes stains and grease
  • Helps prevent discoloration of your clothes
  • Helps keep whites brighter
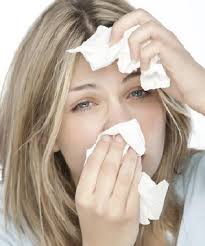
  • Adds a little kick in your effort to eliminate odors.
  • Makes your clothes softer

I like to use boosters on all my loads of laundry, but they are especially useful for those extra smelly loads of laundry we all abhor, such as sweaty sports clothing, ‘soiled’ underwear, dirty diapers, pet bedding, well-used sneakers, etc.. Many are also designed to a super washing soda baby detergent that is gentle on extra sensitive skin.

How to Use Laundry Boosters

Be sure to use your booster with your regular laundry detergent, and don’t wash your laundry with a booster alone.

Each laundry booster product or recipe has its own instructions about quantity and timing, but usually you just add a little to the wash at the beginning of the wash cycle.

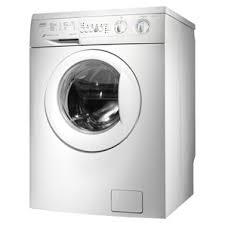
Many boosters are made for all washing machine types, but some are made for only top loading washing machines, and some are made specifically for HE (High Efficiency) washing machines. Again, read the label, but know that there is a booster out there for every type of machine, from front loading machines, to hand washing or other multi-purpose uses.

You will, of course, want to follow all your other laundry washing guidelines, such as washing wool only in cold water, and not mixing whites and color clothes in the same wash load. But generally speaking, most laundry boosters are made for cold, warm or hot water, and for all material types.

You’ll find laundry boosters that can be used on delicates, cotton, polyester, wool, other fabrics, and can sometimes even be used for other cleaning purposes. Most are color safe, but to be laundry safe, be sure to read that label.

Pre-Wash Tips

Laundry boosters also work great as a pre-wash treatment for grease stains by mixing it with a little water and rubbing your new laundry booster ‘paste’ into the stain.

You can also eliminate odors around your laundry basket, as stinky clothes are waiting to hit the wash by shaking certain types of laundry boosters lightly on the clothes before you wash them.

How Do Laundry Boosters Work?

Some say boosters work best with soft water, but doesn’t everything? Soft water makes soap bubble up more, and soft water makes everything, from skin to clothes, softer. But boosters actually act as a water softener, and thus, they are especially effective for use with hard water.

If your booster has baking soda in it, then the high pH of this alkaline substance helps soften your hard water, or make your soft water softer. This makes your laundry detergent more efficient and enhances its ability to remove dirt and stains. Plus, baking soda is a natural deodorizer and is great for removing foul odors.

If you’re a fan of Borax, you’ll find laundry booster is one many Borax uses you maybe didn’t know about.

Some boosters use ‘oxygen bleach’ that is well known for brightening laundry, as well as removing other household stains outside the laundry arena.

And yet some laundry boosters are loaded with active enzymes that act to help brighten your colored and white clothes alike.

So whatever you’re washing, you still need to shop around, depending on your ingredient preferences and laundry needs, but just about everyone can benefit form some sort of laundry booster or another.

How to Get Rid of Dust Mites

How to Get Rid of Dust Mites

dust mite allergies
Dust mite allergies

Learning how to get rid of dust mites is important in order to help control allergic reactions in your home.

Dust mites feed on organic materials such as flakes of shed human skin and flourish in the stable environment of dwellings. House dust mites are a common cause of asthma and allergic symptoms worldwide. The mite’s gut contains potent digestive enzymes that persist in their feces and are major inducers of allergic reactions. The mite’s exoskeleton can also contribute to allergic reactions. Here is a natural remedy for the control of dust mites.

dust mites
How to get rid of dust mites

Researchers at Alexandria University in Egypt found certain essential oils to be effective at killing dust mites, the invisible-unless-under-a-microscope creatures that tend to live in bedding, carpets, furniture and drapes. If you want to keep your allergies at bay, eucalyptus and clove were proven to be the most effective oils for eliminating household dust mites.

Here are three tips on how to get rid of dust mites:

  • Add around 10 drops of an oil in with your laundry detergent when you wash your sheets in hot water.
  • Fill a spray bottle with 1 quart of water and 20 drops of an oil to spray on upholstery.
  • Put baking soda in a sifter and add in 10 drops of an essential oil to shake across carpeting. Then leave the mixture on the floor for 30 minutes and vacuum it up.

    essential oils
    How to get rid of dust mites using essential oils

By learning how to get rid of dust mites, you can control and limit their impact in your home.

How to Clean an Iron

Here’s how to clean an iron:

How to Clean an Iron

Keeping your iron clean is important so you don’t transfer dirt or gunk from the hot iron to the material you are ironing. To keep your iron in good working condition, you should read the manufacturer’s manual that came with your iron.

Be sure to start with a cool iron. Trying to clean a warm or hot iron is not only dangerous, but your cleaning efforts would be ineffective on the hot surface.

If the surface of the iron plate is oily, use a clean cloth dampened with ammonia or window cleaner then use another clean cloth dampened with water to wipe off the iron plate. A clean cloth dampened with vinegar can also be used instead of window cleaner.

If the iron plate has wax-like dirt on it, you can turn the iron into a hot settling and use a scrunched up newspaper to wipe the iron plate. Let the iron cool then wipe it with a clean cloth dampened with water.

To clean in the holes on the iron plate, use a cotton swab dampened with ammonia or window cleaner then wipe holes again with cotton swabs dampened with water. Do not use any sharp objects to scrape or clean the holes in the iron plate. The surface may get scratched.

To clean the water reservoir in your iron, fill it with one part vinegar and one part water. Turn on the iron to get it hot. Let it steam for a few minutes, and use the spray feature. Turn the iron off and let it cool. Empty any remaining liquid from the reservoir. Add water to the reservoir and turn the iron back on. Let it steam for a few minutes and use the spray feature. Turn off the iron and let it cool. Empty the reservoir. You can repeat the water steps if you want to be completely sure there is no vinegar left in your iron.

To clean the rest of your iron, use a clean cloth dampened with ammonia, window cleaner, general purpose cleaner or vinegar. Wipe all surfaces.

And that’s how to clean an iron!

How to Clean TOMS Shoes

How to Clean TOMS shoes:

There are a couple of ways to wash your TOMS which will keep them looking their best: handwashing or machine washing. Firstly, brush off all the dried on dirt from the shoes.

  • Handwashing  Soak the shoes in cold water and a small squirt of mild liquid dish soap. Using a small, soft bristle brush, gently brush the shoe material in a scrubbing motion. If your TOMS are the sparkly ones, be very careful to use the brush in the same direction as the sequins lay.
  • Machine washing Use the most gentle cycle on your washing machine. Select cold water and use a small amount of gentle detergent. When the water level is high enough to fully cover the shoes, add the shoes.

It is best not to put your TOMS in the dryer. The dryer can tear the fabric. The most recommended way to dry them is to air dry. You can stuff a fabric softener sheet in each shoe while they dry. This will help to alleviate shoe odors. Some people use baking soda in a sachet to deodorize the shoes, however, do not pour baking soda directly into your TOMS as this can dry out the insole.

And that is how to clean TOMS shoes!

Fluffy towels.

The cause of stiffness in laundry is usually that too much detergent has been left in the clothing. To make your towels softer, use less detergent than normal, and add white vinegar to the first rinse cycle. You may also want to add an extra rinse cyle when washing towels. Line dried towels do not get as fluffy (although they may smell more fresh being dried outdoors) and soft as ones dried in the dryer.

Perspiration

Sweat stains can certainly damage fabrics, so staining maybe beyond cleaning if damage has occurred.  Perspiration contains chloride salts.

To remove the stains, soak the clothes  in warm water with an enzyme pre-soak product (Spectra or Fade Away are two popular brands) or rub the soiled area with white vinegar.  Wash in the hottest water safe for the fabric. If the stain remains, dampen and sprinkle stain with meat tenderizer. Let stand for about an hour, and launder again.

Always try a small area to test for colorfastness first.

Crystal Decanters

Decanters for wine and spirits are decorative vessels for storing and serving a wide variety of beverages.

Wine can be permitted time to breath before serving, and a leaded crystal decanter is far more stately than a Jim Beam or Jack Daniels bottle.  Often the decorative crystal or glass tops do not seal completely, and when used for alcoholic beverages, the alcohol can evaporate and leave stains, or even a hazy or cloudy appearance.

The first step is to place a thick towel in the bottom of the sink, as a sharp blow on a corner or edge might crack or chip the decanter.  Using warm water and soap fill the decanter and allow it to sit for a few hours or overnight to loosen any residue.  A bottle brush will allow you to gently scrub the bottom to loosen up tough stains.  Rinse the decanter thoroughly, as any remaining soap can taint the taste of future contents.  The decanter may look clean, and clear when wet, however the hazing or water stains, similar to a hard water deposits, may only be evident after the inside is dry.  Allowing a mild acid, such as white vinegar to sit in the decanter, again over night, usually will remove this film.  Some people use rice, rock salt, or baking powder to act as a bit of an abrasive that will aid in the removal of these stains as it is shaken or swirled around in the vinegar solution.  If the vinegar is not acidic enough to remove the film, a mild commercial acid such as CLR can be employed.  Limit the time that the CLR remains in the decanter, and give it a quick wash with regular dish detergent and water, ensuring a thorough rinse before drying the inside.

Some decanters have very narrow necks. Roll up a good quality paper towel and slide it inside the decanter.  (A cheap paper towel might fall apart or leave lint inside) Spin it around to unroll it inside, being careful not to allow the paper towel to fall inside completely!  Remove the paper towel and let the decanter sit out overnight to dry completely, then fill it up with your favorite beverage to be displayed and served in style!

Blood on Bedding Sheets

Easy care is one of the primary reasons people choose cotton bedding. Removing stains from sheets, blankets, pillowcase and other bedding is easy thanks to the fabrics inherent qualities.
Blood is one stain that most people struggle to remove.  In many instances, usable cotton bedding is discarded and considered ruined once blood has leaked on to it.  Additional money is then spent on replacing the seemingly ruined items.
In other cases, much money is spent taking cotton bedding to the dry cleaners as a stain removal solution. In both cases, the result is spending extra money on new bedding that may be unnecessary.

Blood can easily be removed from most washable cotton bedding by using very ordinary household cleaning products.  As soon as a stain is noticed the sheets should be laundered in cold water.  If the stain has dried, pretreat the area with hydrogen peroxide.  It should bubble up and loosen the stain before you wash it as usual.  Another, even more common solution is regular shampoo. Any shampoo will usually do the trick, be it your favorite brand or a less expensive store brand.
For optimal stain removal, it’™s best to remove the stain as soon as possible, preferably upon occurrence.  Albeit, this is not always feasible. But, it is helpful to try to remove blood from cotton bedding before it dries and is ‘set’ to ensure complete elimination. In any case, using shampoo will usually eliminate hours-old stains in minutes.  For stains more than 24 hours old, you may have to first soak the bedding in a large bucket, or even the bathtub. Then, you can get about the task of fighting that stain  which in most cases can take upwards to 5 to 10 minutes, depending on the density of the bedding, or upwards to a day or so if you have to soak the stain.
To remove blood stains from your washable cotton bedding find a good location to begin your stain removal efforts. Keep in mind as bedding is bulky when wet, you want to be near or in the bathroom or by a large sink to avoid water leaking on floors and/or carpet.
Douse the stain with a capful of shampoo, making sure that some shampoo touches every part of the stain.
Rub the soiled portions of the bedding until the shampoo is completely absorbed, then wet with cold or warm water. Once bubbles appear, briskly scrub the bedding. Rinse the stain and evaluate your efforts. Is the stain completely gone? Is their a slight ring showing the shape of the stain? Is the stain still visible? If any portion of the blood is still visible, including a light ring, then follow this step two or three more times. By the third time, fresh stains should be totally removed. However, if the stain has been allowed to sit in the bedding for 48 hours or so even if it is still visible after you attempted to remove by traditional machine washing than you will likely need to pour shampoo on the stain and soak the bedding for several hours. Overnight soaking is also possible, if you desire to do so. Once you have soaked the stain for the allotted time, then you can wash the bedding.
Cotton bedding that has been treated for blood stains by shampoo and rinsed can be washed according to your usual preferred methods and/or the manufacturers instructions. If you prefer bleaching your white cotton bedding, you can do so at this stage  be it liquid bleach for whites or non-chlorine bleach for colored bedding. Since the shampoo has been rinsed out of the bedding, it will not impair your detergent or bleachs cleaning ability.

Always check for stains before drying as the heat from a dryer will set the stain permenantly. If you are uncertain if the stain is removed from the damp bedding, hang outside in the sun to dry. The sun will not only help to bleach out any remaining stains, but it will dry the cloth in a way that will not further set the stain.

Clean Sheets

There is something so delightful about sliding into crisp clean cotton bed sheets on a fresh spring evening or snuggling down into cozy soft flannel sheets on a cold snowy winter night. The scent of sheets that have been air dried on the outdoor clothesline in the sunshine brings back memories for me of sleeping over at Gramma’s house. A comfortable bed with clean linens is truly one of life’s little pleasures. So what is the best way to clean and care for bed sheets?

Firstly, sort your sheets by color. Even though you are only sleeping on them, it is nicer to have clean white sheets, not dull gray ones. Using warm or hot water, wash white cotton sheets separately with regular detergent. Do not use too much detergent. Less is better for sheets. Wash dark colored sheets together in warm water. If you wish to bleach your white sheets, use an oxygen-based bleach or natural whitening alternatives like vinegar or lemon juice mixed with water.

In the spring and summer, let your sheets and pillowcases air dry outside. Either hang them on a clothesline if you have one, or you may even lay your sheets on the grass. Be sure the grass is clean! Did you know that sunshine naturally sanitizes and brightens white sheets?

In the winter, tumble dry your sheets on warm in the dryer with a sheet of fabric softener. (If you are drying only a couple of sheets, you may want to toss in a few clean tennis balls which will help keep your sheets from twisting up together.)

The best way to store your bed linens is to keep them in a dry, airy closet on shelves that allow air through, or on shelves with scented paper. Try not to cram too many bed sheets and linens together so that no air can circulate around them. Don’t leave linens folded up in a closet or packed away for extended periods of time because the fabric will deteriorate along the creases.

Follow these simple hints on linen care to make your bed a wonderful place to be.

Laundry Tips

Keeping Clothing looking new
I recently spent a small fortune on clothing for my two school age children and was wondering if there are any tips for keeping these clothes looking new.
Ahhhh! The mixed emotions of fall. A breath of relief as our kids walk out the door for school, and a tremor of fear when we add up how much their attire cost. Given the expense of new clothing, especially brand name articles, it is prudent to keep everything looking new for as long as possible.
Check the pockets. A pen, a piece of gum, or tube of lipstick can easily damage hundreds of dollars worth of clothing in the washer or dryer. If anyone has learned this lesson the hard way, they will tell you that this is the single most important part of doing laundry.
Always sort machine washable clothing into whites, darks and mixed colours.
Pretreat any stains with a stain spray or stick. In a pinch, even a bar of unscented soap can be rubbed on the stains. Always check for and repair any damaged or torn clothing before washing. It will only become more frayed or damaged in the wash.
Some clothing dyes are not colourfast, and they tend to bleed worse in hot water. Colours will usually become permanent after a wash or two, and heat drying will help accelerate this process. For deeply coloured items, and for all jeans, turn them inside out when laundering.
The pieces of clothing inside the washing machine and dryer rub against one another, damaging the surface of the fabric. This is an excellent argument to not overload your machines. New (to North America) front loading washing machines, in addition to using less power and water, also do not agitate clothing as aggressively, which results in less wear and longer useable life spans.
White fabrics contain optical brighteners, which degrade with bleach, sunlight, and age. Ironically, bleach and sunlight can actually help restore some brightness to your whites. Drying clothing in the sun will frequently lighten stains, and can help remove yellowing. While the occasional use of bleach is also helpful, frequent use will soon damage the fibers, resulting in holes and premature aging. Given all of these factors, the most common cause of poor results with whites, is simply using either too much or too little detergent. Oh, and there is also that new small red sock hidden in a white shirt that makes the whole load pink.
When laundering mixed colors always wash in cold water with similar garments. Check and understand the care labels on all of your clothing. With mixed fabrics this is even more important, as there may even be special care instructions for washing and drying!
When transferring clothes from the washer to the dryer, shake out each item, and at the same time check for stains. By shaking out the clothing, it will help prevent wrinkled messes when items ball up on themselves, and by removing and air drying stained items, it will give you a second chance at removing the stain before it is permanently heat set by the dryer.
Clothing should not be over dried. It wastes energy, and will also prematurely age the fabric. Instead of ironing clothes, try removing them from the dryer while they are still slightly damp. Give them a couple sharp shakes, and air dry them on rust proof hangers. You can’t stop your kids from growing out of their clothing, but with a little common sense, you can be sure that this is the main reason an item has to be retired.

error

Enjoy this website? Please spread the word :)

Instagram
Follow by Email
RSS