...

Microwave cleaning made easy…

Cleaning your microwave is as simple as microwaving a cup of water for about five minutes. When it’s done, the inside should be nice and steamy, and wiping out the grime inside will be easier than trying to wipe off the hardened baked on food from multiple plates of leftover spaghetti with sauce incinerated to oblivion.

I also sometimes add a slice of lemon (if I have any) to make the aroma more pleasant.  And if the teenagers have been particularly messy I may have to repeat to procedure a few times to get the inside spic and span…

Also be careful not to burn your self with the hot water etc.

Baking Soda Uses for Odor Control

Baking soda Uses neutralizes odor by turning them into inert crystalline salts over time.  That’s what the crust is over the top of the baking soda in the fridge etc.  Changing the box frequently is best (every 1-3 months), you can then use the baking soda when making basic home cleaning solutions to clean sinks, counters or garbage cans etc.  My favorite is the sink, and kitchen garbage can.  That way I know I am keeping up on some of the detailed kitchen cleaning by giving my kitchen garbage can and stainless steel sink a through cleaning once a month when a change the baking soda in the fridge.

Cast Iron Pots and Pans

Always store cast iron pans in a dry place and place paper towels between them.  Also leave lids off to prevent moisture and prevent rusting.

Soapstone Countertops

Immediately wipe the spill using fresh cleaning cloths and a neutral cleaner. Soapstone stains easily.  Avoid abrasive cleaners, bleach, oil,  vinegar or acidic cleaners, ammonia. Always rinse with clean water to avoid residue.

Glass cooktops

Here is a excellent tip submitted by Lisa, I have never seen the name brand of cooktop cleaner in my area but I will definitely look for it based on Lisa recommendation.

I clean houses for a living, and the best way to clean a glass cooktop is to purchase a bottle of Weiman Glass Cooktop Cleaner. Squirt a generous amount onto the cooktop and spread around with a wet paper towel then wipe off with a dry paper towel until the cooktop shines. For cooked on stains, VERY CAREFULLY use a paring knife or other knife with a sharp, straight edge held almost parallel to the surface to scrape the residue from the surface before removing the cleaner with the dry paper towel. You may have to use more cleaner or wipe it away and reapply it to get everything. This works extremely well, and I have had clients ask me how I get their cooktop so clean.

Cleaning Ceramic or Glass Cooktops

I find glass cooktops & ceramic cooktops especially difficult.  They look so nice before you use them but I have never seen one that looks that way after even a small amount of use.  Even 6 months of mild use leaves them looking less than perfect. The best recommendation is to never let food overcook or spill on the hot cooktop.  Maybe having a super thick terry towel that you wet down so you can wipe a hot cooktop when you spill something but I am not sure that is realistic. When its cool super easy to remove spills but hot cooktop translates to more difficulty removing stains.  Use the manufacture recommended cleaning solution for glass cooktops and ceramic cooktops cleaning. Otherwise use a non abrasive cleaner and nonabrasive scrubber.  I have seen very badly stained glass cooktops where you have to use a more aggressive approach like oven cleaner and a plastic scrubber and you can restore those to some degree.  My opinion as someone who has seen many many glass cooktops, is not to buy one unless you don’t cook much.

Cleaning out a garburator

Garburators are under appreciated and generally unnoticed appliances that is until they stop working, start to smell funny or sound like a blender filled with marbles and nails.

Garburators are essentially a hefty motor attached to an impeller that pulverizes food until it is small enough to pass into the drain pipe as you run water into the unit.

These units are very reliable, but many older units tend to have problems, especially when they are not used for extended periods.  Garburators mix water and electricity which is typically not an ideal combination.

The most common problem is that the unit just stops working when you press the switch, and this is often realized after you have dumped the most disgusting mix of old food scraps into the unit, and they start to smell because the pieces are too large to wash into the waste drain pipe.

First things first press the wall or sink top button and listen carefully.  If it is working you will definitely hear it turn on, or you may hear a very soft humming or buzzing noise from beneath the sink, or you will hear absolute silence.

If you hear nothing at all, grab a flashlight and look at the bottom or side of the giant motor hanging beneath your sink.  There will be a small (usually red) button, which is an internal safety reset.  Press this button in (you may need the end of a pencil or your pinky if it is inset into a small indent).  If this button has popped out, there is a problem with your garborator, but if the button is depressed already, try to identify the breaker on the main electrical panel, and see if it is switched on.  If the breaker is tripped, reset it by turning it off, then turning it back on.  Test the garborator again. If it works, fantastic, otherwise you may hear the humming noise, (perhaps just briefly) before the breaker or safety reset trips off again.

If you hear the humming, even if just briefly before the breaker shuts off, likely the unit is seized. This sounds like bad news, but frequently it is simply because the unit hasn’t been used for months, or years.

Turn off the breaker, ensure that the switch is in the off position, and proceed to remove the rubber gasket in the mouth of the unit. With a flashlight, you should be able to see clearly into the unit (after you have scooped out all the disgusting food scraps mentioned at the beginning).  With most the food removed, you can usually wash away the small scraps, unless the drain is plugged, in which case you need to remove the waste water in the unit as well.  There are special suction tools for this, but in a pinch a turkey baster, or a car wash sponge will allow you to soak up enough water to see the impeller.

The impeller should turn freely.  If it doesn’t turn (try the end of a wooden spoon) easily, this is what is causing the reset switch or breaker to trip.  Food, dishwashing goo, rust and other assorted stuff can seize up the impeller, which causes the reset switch or breaker to trip, resulting in the clogged and/or smelly garborator.

Sometimes a wooden spoon with a long handle is enough to spin the impeller loose but often a small crowbar or large screwdriver is required.  Be certain the unit is turned off at the breaker when trying to free the impeller!  If you aren’t comfortable or absolutely certain you have disabled power to the unit, call a plumber!

Once the impeller spins freely, replace the rubber gasket or garborator sink stopper, turn on the breaker, double check the safety reset switch and turn the unit on.  If you had the impeller spinning before, the unit should roar to life.

If it is smelling sour, cut up a lemon and dump it into the unit to help clean off whatever it is that is causing the odor.  In fact, once a month or so, it doesn’t hurt to cycle the unit, to be sure it doesn’t seize up again.

If this does work, you have just spent 20 minutes saving several hundred dollars, if this doesn’t correct the problems you are experiencing, likely you require a new unit.  Good luck!

Stinky Fridge/Freezer

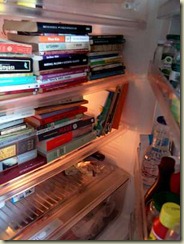
fridgebooksI have a refridgerator/freezer that is kept outside in a shed for summer use. My husband unfortunately (understatement) did not clean it out but unplugged it (yes he is still alive but barely LOL). I cleaned it out (Hepa mask, gloves and all)using Clorox cleanup they are both clean but the smell is still noticeable. We placed 2 boxes of baking soda in the fridge and in the freezer but the smell is still there
PLEASE HELP

Eeeewwwwww….Yech!

You are obviously a very compassionate woman for sparing his life.

Your initial instinct was correct. For a fridge that has maybe a day or two of odors, this will work, however since the plastic has been absorbing this fragrant  odor for several months, you have to be more aggressive.

The clean up you did is the first step, although it would have seemed more appropriate if your husband were forced to do it sans the respirator and gloves.

Try a shallow pan of active charcoal, which you can find at your local pet store or aquarium supplier. Let this sit for a few days and see if it helps enough to make it tolerable. Another great hint is to fill a shallow pan with fresh ground up coffee. This smell is more powerful, and it too will be absorbed by the plastic. This is more masking the problem than removing the odors, but it is likely better to smell coffee, than, well whatever it smelled like. (And I thank you for not describing that part to me)

If this still does not work to your satisfaction, we have one final idea. Empty the fridge and be sure it is ON, crumple up some old newspaper, and mist the paper with water. Stuff the fridge full of these big balls until it is entirely filled. Replace the old newspaper, with new, fresh moistened newspaper balls every other day. Try using the sports section before your husband reads it, to remind him that it was his mistake. Repeat this four or five times (yes this will take a week to 10 days!), at which time it should be OK to breath when you open the door. It is possible the fridge will require defrosting once you have done this, if all the moisture has migrated up the freezer.

Even when you are done this, the baking soda, and/or ground coffee won’t hurt, although the coffee may flavor unsealed food as well.

Failing all of the above, put your husband in the fridge, dump them in a landfill, and go get yourself a new model of each.

How to clean the kichen sink

The vast majority of homes have standard, very durable stainless steel sinks.  There is a reason for this – they are inexpensive, stand up to years of use (and abuse), and can be cleaned up to look almost as good as new.

The most common staining with stainless steel sinks is the brown residue left when coffee is poured out, but not rinsed away. This discolouration can be a subtle yellow to a dark brown, especially if the sink is located at the office near the coffee station.

There are several solutions, the quickest is a cream cleanser and an SOS or abrasive scrubbing pad.  If you don’t feel like scrubbing, a mild acid such as CLR will typically remove these and any hard water deposits.  Just plug the sink and pour in at full concentration and leave overnight!

If the sink is very dull, or badly scratched you can polish it with fine steel wool, and metal polished typically found in the automotive isle for restoring the finish on aluminum wheels.

For acrylic, or solid surface materials check the underside of the sink for the manufacturers name and consult their web site for proper care instructions.  Usually to remove minor staining an acrylic safe cleaner and/or melamine sponge (such as a Magic Eraser) will remove surface staining.

The best preventative cleaning is to rinse the sink after each use, especially after discarding coffee, tea, colas and tomato based foods.

error

Enjoy this website? Please spread the word :)

Instagram
Follow by Email
RSS